Sunday, February 28, 2010

Make a Mini-Book with a Greeting Card!


When I received this gorgeous card from Eliza Wheeler, of Wheeler Studios, from a card exchange I'd organized last year, I knew that I had to save it for something special.

I finally found what I was looking for in an online tutorial that cleverly showed how to make a cute little booklet out of a letterpress card.

Here's my version:


Gather up these items: a cute card, a paper awl (to punch holes), some twine and some plain paper. Some binder clips are handy.

Cut your paper to the same size as your unfolded card. Fold in half, creasing the fold well. As I'm a little anal, I trimmed the paper down about a 1/4" off the top and and 1/8th" off the side (to give a tidy 1/8th" clearance all the way around).

Insert your paper "guts" into your card and center it. Use the binder clips on either side to hold it in place.


Use the paper awl to punch three holes in the spine of your booklet (one in the center and the other two perhaps and inch from each end).

Thread your needle with your twine. If you'd like to use baker's twine (which is so adorable!), Annie42's Etsy shop is a terrific source for it! (and she's super nice!)

Sew your booklet this way: Starting on the outside, push your needle through the center hole. Then poke your needle through the bottom hole to the outside again. Poke your needle through the top hole to get back to the inside. Poke back through the center hole. Both thread ends should now be hanging on the outside through this center hole.

(for a more thorough explanation of this binding technique, check this link)


Make sure that each twine hangs on opposite sides of the middle twine and tighten it up. Tie a bow or make a square knot and trim the ends. You can trim it close or leave a bow or even hang beads on the twine.

(if you prefer the ends of the twine to be on the inside, just start on the inside of the booklet)

Enjoy!

Wednesday, February 24, 2010

World Crafty Domination


So what do you do when you've been laboring at your crafts, becoming moderately successful and are ready to take things to the next level?

If you're like us, you gather together some like-minded people and form a powerful cabal!

The first meeting of World Crafty Domination convened on Monday, over pretzel fondue and burgers at a local pub.


Above, Shawn Gascoyne-Bowman (the brain behind www.criminalcrafts.com), me (of Molly Lee Cards) and Wendy Cull (DoggoneKnitting and QueenBeeHandmade)


And Kathy Larsen (MosquitoLodge), Linda Candello (Crafty Linda) and Jane Sabatini (half of Three Little Clouds).

Not present were Christine Thatcher (Christine Marie Studio and Eugenia Sabatini (the other half of Three Little Clouds).

Between us, we are veterans of the craft fair circuit, have sold thousands on Etsy, taught classes, taught ourselves our craft, shopped around book proposals, FaceBooked, Twittered, been featured in magazines and numerous blogs, are resting retail space in a bricks and mortar store, and, well, pretty much approached the crafting world at many, many different angles.

Why am I going on and on about a social engagement? If you happen to be stuck in a crafty rut, put out the word to find other crafty people, set a date and meet! Not all of our group knew each other and we'd never met with the sole purpose of finding ways to take over the world one cute handcrafted item at a time.

The energy and flow of ideas was so invigorating! Each of us had different skills and experience to bring to the table.

We've created an online group where we can keep up with the exchange of ideas and continue the spirit of collaboration.

Some of us will be attending the I Heart Portland/Etsy Meet and Greet on Friday at PNCA together and we've made plans to meet again in March, to check out Kathy and Christine's mini shop within a shop.

More to come!

Tuesday, February 23, 2010

Mason Jar into a Soap Dispenser


Apartment Therapy always has such terrific ideas!

Check out this super cute soap dispenser from a Mason jar...

Sunday, February 21, 2010

Gymini Giveaway!


**********************************************************

Hooray! I've drawn a winner for this contest!

Emily (HutchyHutch) was the randomly drawn winner for the Gymini! I have sent her a note to get her address from her so that my very generous sponsor, CSN, can send the play mat to her.

Thank you, everyone, who entered this contest! And thank you, CSN, for making this all possible!

**********************************************************

When my boys were tiny, they spent time literally every day of their lives til they were past six months playing in a Gymini, probably one of my favorite baby products ever.

And -- yay! -- thanks to CSN stores, I get to give one away!

(CSN is an online source for all kinds of family-friendly products, from kids bedding to high quality toys and games to some amazing kids furniture.)

Let me tell you why I seriously love the Gymini: it's a play mat with two arches that connect to make a framework to which to attach baby toys. At first your babies will just enjoy looking at them, but as they get bigger, they'll reach and grab for them. You can swap the toys around for a little variety.

The best part about it is how simple it was to disconnect the snap at the top and fold the playmat flat. We took ours everywhere! When we visited homes, we didn't have to worry about finding a safe, clean spot to park the children -- we just brought it with us.

Convinced yet? Take a look at all three of my boys, enjoying the Gymini some awesome friends bought us (thanks, Bob and Chris!):


The boys are tuckered out from a fun play session (are they so incredibly cute or what?). The version that we had wasn't nearly as nice as the one I'm giving away this week!

If you're interested in winning one, all you have to do is leave a comment with your email address. If you follow this blog, leave a second comment saying that you do for an additional chance to win. (if you don't leave your email address and it's not provided on your profile, then I'll have no way of contacting you to let you know you've won!)

I'll collect comments for a week. One winner will be selected at random on noon on Saturday, February 27th and notified by email (the winner's name will be posted here as well).

Good luck, everybody!

And thank you, CSN, for this fun opportunity!


Thursday, February 18, 2010

Let's Get Fit Together!


Today's tutorial and free download is a fitness log!

All right, a fitness log might seem to be an odd choice of a download for a crafty blog, but given my recent post of putting some balance in my life, it actually feels just perfect to me. Life is not all about the latest clever card-making technique, after all!

One thing that always helps me keep on track, fitness-wise is if I have to log what I do. The fact that I'll have to record a big goose egg under exercise for a day is one way to motivate me right out the door for a quick walk. I've been working out diligently for about two months now and I'm ready to share this with you!

First, download these two pdfs:


You're more than welcome to download them and print as many as you need for your own use, to share with friends or whatever! I do ask that you not sell them, of course, or make a product for use in resale (that would just be rude!).

Print one copy of the Motivation Pages and as many copies of the Fitness Log Pages that you think you'll need. Perhaps start out with eight sheets -- this will get you through 32 days and a month seems like a good start. Plus it makes a cute-sized book.


Cut all the sheets in half one way and then in half again. If you want to keep things simple, you can just staple the sheets together on one end, adding in a front and back cover to make it a little fancy. Another thing I've done is take the whole stack to Kinkos and have them bind it into a little book with spiral binding -- super cute! But today I'll show you how to make a cute cover from the comfort of your own home with just some cardstock and a stapler.

You'll need two pieces of card stock. Cut your cover to be 4.25" x 5.5" -- in this case, this is my yellow cardstock.

Cut the other (green) piece to be 4.25" wide and about 7" long (it will be cut down shorter than this).

Score the green cardstock 5.5" down and fold on this score. Line your stack of paper up against the fold and mark the thickness of the stack of your pages. Score the cardstock again at this mark. Make another score 1/4" away from this last score. Cut the end of the cardstock another 1/4" away from THAT score.

This sounds a lot more complicated than it is. Just look at the photo on the far right in the middle row: the first score is 5.5" in, then another score the height of the stack of paper, then another score 1/4" away from that and then cut 1/4" away from that.

Straighten your stack of pages. Put the cover (yellow) on top of the pages. Line the newly cut edge of the long cover with the left edge of the stack, on top of the yellow cover. Staple the entire stack close to the fold. Then fold the green cover over and around.

So cute! I love this kind of binding where the cover folds to hide the staples -- I used this technique on my own wedding invitations, a few years ago.

I'm a simple kind of gal, so I've left mine as it is, but I know a lot of you papercrafting lovers would enjoy embellishing your cover to your heart's content.

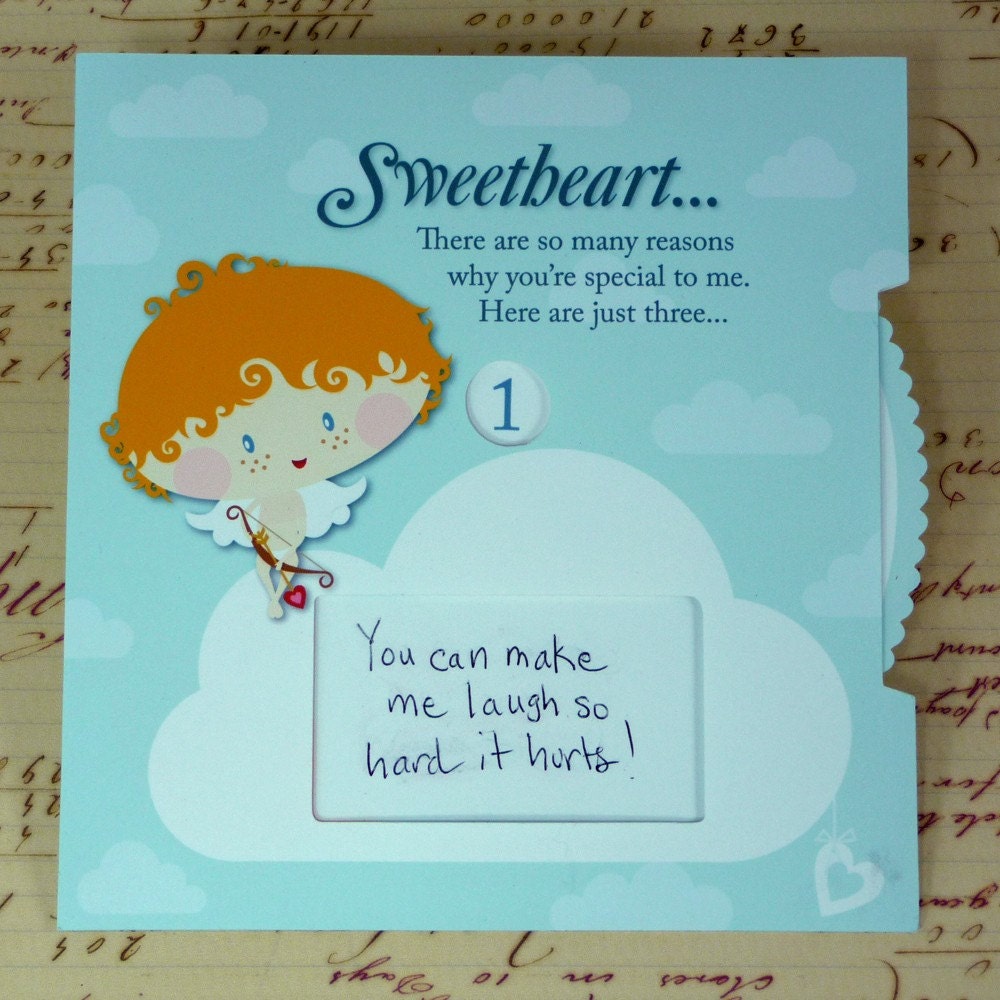
How to use it: the motivation pages are meant to keep your focus on your goals and remind you of why you're doing this.

Where I'm going is the page you'll fill up with your goals (I want to lose 20 pounds! I want to get in shape to run a 5k in the fall! I want to fit into my skinny jeans again! I want to walk into my class reunion and make heads turn!). Put it all in -- be as descriptive and detailed as you possibly can make it -- you want to make it more enticing than, say cheesecake!

Where I've been is where you'll note what you want to leave behind (I couldn't keep up with my nine-year old biking. I outgrew every pair of jeans in the house.). Again, pour yourself out here!

I will is what you'll be doing to achieve your goals. Instead of saying you want to lose X pounds here, this is where you put in how you will get there (I will do a 10-minute mini workout every morning before work and a 30-minute run on alternate days after work. I will pack a healthy lunch and snacks for work every day. I will allow myself no more than 100 calories worth of indulgence a day (even if that's just one bite of something decadent). I know I will fall off the bandwagon occasionally and if that happens, I'll get right back on again!).

I won't will be where you'll list all the potential stumbling blocks that have plagued previous efforts (I won't snack after 7pm. I won't eat the leftovers off the kids' plates. I won't defeat myself with negative thinking.).

The Fitness Log Pages
Use the fitness log pages as you wish, but try to log every single day. For me, weight loss is trying to keep my calories in lower while maximizing the calories out, so that's how I've organized things.

I put in a space for a mini workout (this could be a set of tricep dips off my desk chair at work) in addition to cardio and weight training. I log my minutes, but you can do as you like!

One of my biggest hobgoblins is evening snacking. I put in a spot where I'd have to mark whether or not I succumbed to this particular issue. Just having this there would make me hesitate about dipping that spoon into the ice cream...

I put in a generic temptation notation for you to use as you wish.

However you use it, the important thing is to use it! Keep it with you always (in your purse, handy with a pen -- if you find yourself early for an appointment, walk around the block and then log that extra walking time!).

I hope you like this download! Enjoy! If you use this or would like to share your own fitness goals and ideas, I'd love to hear from you -- please leave a comment!

Saturday, February 13, 2010

Pop-Up Card Giveaway!


**************************************************
WINNERS HAVE BEEN CHOSEN!

Thank you to everyone who entered to win a card in this giveaway!

The winners are (drumroll please!):

Mavericks Mommy (Drink a Toast Birthday card)
Kittycat/Tiffany (Birthday Cake Pop-up card)
Emily (Three Reasons Why They're Awesome card)
Darci K (Hey Cancer, Take THAT!)
Marie McGrath (Three Reasons Why She's Wonderful Bouquet card)

Thanks again! I will be contacting the winners shortly to get your addresses to send you your cards!

**************************************************

Well it's a whole new year and I'm dying to do another giveaway! Now's your chance to get a free pop-up or mechanical card of your choice from my shop! I will choose five winners at random, so there's a good chance of winning.

How to enter? All you have to do is check out my etsy shop and then come back here and leave a comment about one of my cards. Pick any single pop-up card that you like and tell me what you like about it! Be sure to include your email address so that I can contact you if you're a winner! Whichever card you select will be the one that you win!

For a second chance to win, you can follow this blog and leave a comment saying that you do so (if you already follow me, just leave a comment saying that you already do).

For a third chance, become a FaceBook fan by clicking on the link. Don't forget to leave a comment letting me know that you're a fan!

You get another chance if you follow me on Twitter: http://twitter.com/mollyleecards. Don't forget to leave a comment letting me know that you follow me!

And, lastly, if you have a blog, mention this giveaway on your blog and leave a comment letting me know with a link to your blog post.

This giveaway ends in about a week, February 21, at noon and winners will be announced at this post. Winners will also be notified and the prizes will be shipped out shortly thereafter.

Thursday, February 11, 2010

Reusable snack bags from Mosquito Lodge


Check out these amazing reusable snack bags from Mosquito Lodge, a new Etsy shop!

They're lined with nylon and feature velcro closures. When you're done using them, just flip them inside out, closing the velcro and toss them in the washer. The little bags, available in a variety of cute prints, have gussets so that they will stand up on their own.

I think they're terrific to bring nuts and healthy nibbles to snack on at work. I gifted a mom of young kids with a set of these and she's gotten rave reviews from the other parents at her preschool.

In addition to the nifty snack bags, Mosquito Lodge also sells some handy iPod Touch covers and the sweetest lavender sachets you'll find anywhere!

Sunday, February 7, 2010

In which I contemplate watching more tv

I've always been an all or nothing kind of gal. A few years ago, I got obsessed with fitness. I worked out a LOT! I was getting up an hour or so early, working out an hour, walking during breaks at work and doing other workouts in the evenings.

When the kids were babies, of course, my only focus was on them and, almost literally, every waking moment of my life (other than work) was aimed at them. When I wasn't caring for them, I was preparing food for them, finding and reading literature on how to better care for them, etc. I barely had time to feed myself at this time.

After buying a KitchenAid stand mixer, I spent a good year baking bread and other high-carb treats in my spare time (giving most of it away, but still gaining a good chunk of weight anyway). Knitting followed a similar pattern (and I have a LOT of leftover yarn stash in the basement still!).

2009 was definitely the year of Etsy for me. I really worked hard on my shop, designing new cards, refining my photography, bending over backwards to accomodate the smallest of requests. It was insane! Again, I was waking up an hour, sometimes two, early in the morning to work on new ideas, fulfill orders, write in my blog and more. After work, I would spend a little time with the family but then be irresistibly drawn to my email to check on orders or to check on Etsy to see if anyone had left me feedback, to Google analytics to see if my latest postings had brought me any traffic.

I belong to the EtsyGreetingsTeam, a collection of Etsy cardmakers and one topic getting a lot of notice on our discussion boards has been our goals for our shops. People have chimed in eagerly about wanting to take their sales figures past the 40, 100, 500 mark, about blogging more regularly, about putting together new designs, starting a FaceBook fan site, etc.

I may be the only member of the group seriously thinking that I need to watch more tv.

Let me 'splain: Last year was terrific for my shop and I had so much fun, but I spent so much of my mornings, evenings and weekends fulfilling orders and tending to business that I feel like I've neglected other parts of my life. I stopped exercising (and my blood pressure's gone way up!), I was having very little down time, my other interests took a back seat (I stopped knitting, baking, reading for pleasure).

It was all Etsy, all the time.

So when the other gals on my team talked about how they were going to achieve more, more, more on their shops, I realized that I needed to do much, much less.

If I set a goal for my online crafting business, this may take time away from other activities. Time is the single most valued commodity in my working mom's life. Since it's a limited resource, I need to budget myself very, very carefully.

So I'm cutting back on the Etsy addiction and making a conscious effort to exercise more, to spend time with my husband and play with the kids and catch up on the television that we've cut out the last year -- we need to catch up on last year's Lost episodes before the grand finale!

Saturday, February 6, 2010

Ink is putting me in the red


Last fall, I took some of my card profits and invested in a nice new printer, an Epson 1400.

It's really nice! I love being able to print on large paper (I can print on 12 x 18" cardstock, for instance, and trim it down to get letter-sized paper with full bleeds -- awesome!).

But here's the downside: the thing guzzles ink like there's no tomorrow. Seriously, I need to enroll my printer in some 12-step program.

Above are 46 empty inkjet cartridges. Most of them were used up when I was in crazy production mode before the holidays. Forty-six inkjet cartridges at about $20 a shot... well, I can't even bear to do the math on that.

Paying for the ink has seriously put the profitability of my shop into jeopardy, however I did find what I think to be a good solution: knock off inkjet cartridges.

There are several different online sites. I found the FAQs on this site to be quite reassuring: http://www.itsupplies.com The fact that they offered free shipping and a 75% reduction in costs was tempting enough for me to venture out of my rut of paying full price for the comfort of using something approved by Epson.

I've only had a chance to use a few of them so far and haven't see any problems yet. The cartridges do look a little different than the original ones, but so far the results have been really positive so far! At least, I can't see any difference in the quality and the printer hasn't exploded or anything...

Wednesday, February 3, 2010

Cupid Pillow Box Download and Tutorial


I never realized how easy pillow boxes were to make until I'd checked out a tutorial. Then I had to make my own and share it with you!


Cut around the box on the solid lines. Carefully score on the dotted lines (using a ruler on the straight lines helps).

Fold along the straight lines. Apply glue to the flap (it's good to get it in the corners).

Carefully fold on the curved lines, folding the sides with the finger hole in first.

Be sure to stuff with little treats, like chocolate truffles or maybe something a little blingier to make your Valentine's Day!

Enjoy!

For an extra special Valentine, check out this coordinating card at my Etsy shop!


(It's part of my Three Reasons series cards -- you turn the wheel and write in three reasons in the spots: 1, 2, 3 -- they're a lot of fun to fill in!)