It's high time for another crafting day with some friends!
This weekend, I'm breaking out the Bind-it-All I begged the family for a couple of years ago for my birthday. I made this little sketch pad with it (the cover is from a box of tea):
Isn't it cute?
These pretty books are what we'll be making, with scrapbook paper and chipboard for the covers:
And the insides will be envelopes that I'd rescued, back in the days when I dabbled a bit in dumpster diving:
The envelope booklets can be used to collect receipts over the year, paper ephemera, ideas, etc.
I have some lovely paper and I've taken a road atlas apart for the covers:
Should be fun! Looking forward to crafting with friends. I'll post photos of what we do next week!
It's just a matter of time before you're smitten...
They were popularized a few years ago by the utterly fabulous Bakerella... and now you can find them at Starbucks... you can buy machines to make them with, but I wanted to do it old school, the way Bakerella intended us to do.
Check out her site for loads of tips and adorable inspiration.... better yet, beg, borrow or buy her wonderful book:
It's utterly chock-full of the most marvelous creations.... and while the website gives you all you need to make your own cake pops, the book goes into the ins and outs in much greater detail.
I decided to make pops based on the Hello Kitty pops posted on her site.
As instructed, I made cake from a packaged cake mix. I chose red velvet cake, but, with some modifications to make it more like from scratch (substituted melted butter for the oil, buttermilk for the water and added a tablespoon of vinegar for that familiar red velvet tang).
Once the cake is made and cooled overnight, break it all up til it's just fine crumbs.
You're then supposed to mix the crumbs with prepared frosting, but as I'm not a fan of canned frosting, I made the homemade cream cheese frosting from this site instead: http://www.thekitchn.com/how-to-make-cake-balls-78637
Mix it all together til uniform. You might need to use your hands (it's helpful to have some handy middle schoolers on hand for this messy job -- rewarding them with a lick of the frosting beaters helps!).
Pop in the fridge for at least 15 minutes to firm up a bit. Then roll into balls (I used a scooper to measure out uniform amounts).
Put the balls in the freezer for another 15 minutes or so. In the meantime, melt some Wilton candy melts -- I had to use two 14oz packages to cover a batch of cake balls. Nuke them in the microwave in a small bowl for 30 second intervals, stirring in between, til they're all melted.
Now comes the fun part!
Take your balls, reshaping if necessary. Dip a lollipop stick into the candy melt and then push deeply into your cake ball. Set aside that ball while you do a few more balls.... it needs a little time for the candy melt used as "glue" to set.
When you're ready to dip into the candy melt, try to do it in one motion -- the less you swirl the cake pop in the candy melt, the better (too much time spent at this step will result in the bumpy surface). Gently tap the cake pop to allow excess melt to drip off, then give it a swirl to incorporate the last little drip into your pop.
This will make a perfectly round cake ball. Before the candy melt has set, you can sprinkle it with candy decorations.
To make the kitty shape, with ears, Bakerella cleverly instructs you to adhere chocolate chips where the ears are with candy melt before dunking... the smooth coating over the cake ball and chips will give you that adorable Sanrio shape.
Ideally, I would have punched holes into a spare bit of styrofoam to hold my drying cake pops, but, sadly, we had no such styrofoam, so we made do with a wicker basket, making for an odd device in the kitchen....
Once the candy melt has fully hardened, you can draw in extra features with edible ink pens. This is another marvelous invention Bakerella introduced me to! Felt tip pens you can use on food! They made drawing in Hello Kitty's features really easy....
This would be a fun project to do with kids or other crafty adults. Just have lots of interesting candies and sprinkles on hand to decorate your treats with...
Hope you enjoy!
Wednesday, January 4, 2012
Happy New Year!
Happy Chinese New Year, that is...
The Lunar New Year begins on January 23rd. Will you be ready?
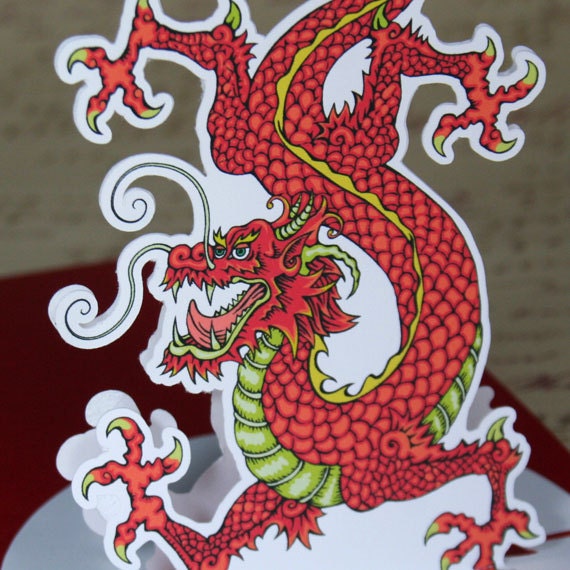
2012 is the Year of the Dragon, a most auspicious astrological sign. It also happens to be the astrological sign of my twins, who were born in 2000, a golden dragon year, triply full of luck. Coincidentally, their father and paternal grandfather were also born in dragon years, so I'm surrounded by these fire-breathers!
So, of course, I had to make the effort and make a few cards... I'll definitely make one for my mom, who really was psyched about the whole golden dragon thing (and she's normally not into that kind of thing at all, but my pregnancy suddenly had her spouting off strange superstitions like an extra from the Joy Luck Club).
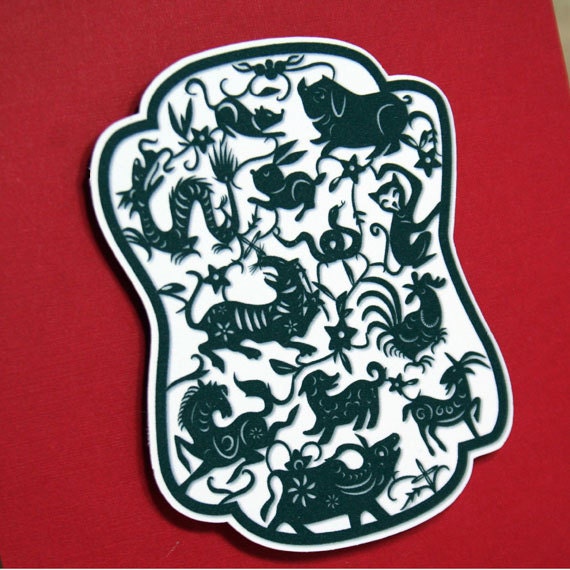
I found some lovely artwork depicting the twelve animals of the Chinese horoscope, which adorns the front of this card:
The inside of the card is blank... in fact, there is no writing on the card, in English or Chinese, making it appropriate for other cultures celebrating the lunar new year. Or as a notecard or birthday card to someone who happens to have been born in the year of the dragon.
For full details, check out my Etsy listing for the card:
Time for some holiday crafting! I love sharing these freebies with you!
This year, the nieces and nephews are all getting gift cards... to make them a little extra special, I designed a pop-up holiday gift card holder. With a very simple mechanism, the recipient opens the card and.... snap!... the gift card is presented with a little pop...
Here's how you do it....
First download these two pdfs:
Then follow along with the instructions and photos below....
1) First print out one of each pdf on some nice stiff cardstock. The outside of the card (with the elf) is 2-up, meaning that there are two of that piece on one piece of cardstock -- you only need one for one card, but I figured you might want to make a second one (and I hate wasting paper). 2) Cut those two pieces apart, as shown. I could only fit one of the inside piece (on the tan background) on one piece. Cut that piece out, close to the colored area, as shown.
3) If you have a scoring board, score the inside (tan) piece along the three vertical lines -- scoring is optional, but it does make your folds nice and crisp. 40 Score the outside piece in half.
5 & 6) Fold the inside (tan) piece in half (unprinted sides facing). 7) Find the diagonal slash mark along the fold and cut that.
8) Fold along the other vertical lines to make the little mountain as shown in the last image, above.
1) Fold the outside (elf) piece in half. 2) Put the adhesive of your choice on the first panel of the inside (tan) piece. 3 & 4) Line the outer edge of the inside (tan) piece to the outer edge of the outside (elf) piece and adhere. 5) Squish down the folded inside piece so that the folds are compressed. 6) Put adhesive on the back panel of the inside (tan) piece. 7 & 8) Fold the card closed, adhering the back panels together.
1) Open up your card. It should look like the first image, above. If you like, trim the edges so that they're all even (no matter how careful you are, the edges won't ever meet up exactly right). 2) Partially close your card and place your gift card in to the diagonal slash.
When your recipient opens the card, the gift card will "pop" into place!
Enjoy! I hope you like this holiday freebie! Let me know if you make this card!
My friends, Jen and Jason, were married in September. As a wedding gift, I offered to do their invitations (and a better client I've never had!).
Jen wanted a brocade pattern, which we used as a formal, classic background. The quote for the front read: "Love is friendship caught on fire." I love the gorgeous label she selected!
(in addition to the invitations, I helped her with commemorative bookmarks that they gave away at the wedding -- you can see them in the above image. I've enjoyed having Jen and Jason peer at me over the pages of my books, helpfully holding my spot for me)
Open the cards and they pop up at you... it's a fun and fresh idea for an unusual wedding invitation!
Their daughter, obviously an important part of their lives, was a fitting addition to the invitations, peeks at us from a hidden support in the card.
The invitations were placed in translucent vellum envelopes which allowed the black damask pattern on the backs of the cards to show through, which made for an intriguing preview of the contents.
The invitations were fun to do (it's great having easy, laid-back clients!) and I have been compensated by boxes of comics gifted to me by Jason, which my boys (okay, along with me) have loved (especially the Star Wars ones!)....
As part of the 52 Weeks of Mail effort, I decided to mail my great nephew-in-law a belated birthday card, rather than just settle for sending him a greeting through Facebook.
This is my favorite card that I make... when you pull the lever on the right, he raises his beer in a toast and says "A birthday? I'll drink to that!"
The envelope is a page from a comic book (it's a duplicate that the boys had) that I thought would be fun to use my Martha Stewart Scoring Board on.... LOVE making envelopes with that thing!
On the back, I stuck on a label for 52 Weeks of Mail:
I love this effort! It's been motivating me to use mail more... and this way of reaching out has encouraged my friends to reach back out to me. Love it!
I made some slight adjustments and cut them out of black cardstock.
Working outside, I sprayed them, a few at a time, with spray adhesive and then sprinkled black glitter on them. I like to press down lightly on them with my hands before shaking the excess glitter off.
If I'm being particularly good, I'll give them a coat of clear acrylic spray to seal the glitter on better.
I think they're lovely!
I was so enamored of how cute they looked (the very delicate handles on the jack-o-lantern and the tiny teeth in his mouth) that I ended up cutting out probably dozens on my robo/silhouette and sending them out to all kinds of people.
I didn't mount them on cards -- they were so sweet just as they were -- but I put them in some old glassine envelopes that my husband no longer wanted.
I wrote a short message on the backs with a white pen.
And sent them off to people all over the place!
It was fun because I know most people wouldn't be expecting a Halloween greeting from us, so it will be a nice surprise.
Combine an intricately cut silhouette (cut using the Craft Robo/Silhouette) with spray adhesive and a little bling from glitter and I'm transported...
I love this blog: http://papercutting.blogspot.com/ It's called Scherenschnitte ("scissor cuts" in German) and is the papercutting blog of the very talented Cindy Ferguson.
Her work is FABULOUS! And I can't believe that she cuts her work by hand... and awesome feat!
On Tuesdays, Cindy has a feature called "Template Tuesday" which I very much look forward to! She features an original work that you can download as a pdf, so that you, too, can be a papercutting genius!
I really loved this particular Template Tuesday offering, of a girl on a bike:
You can read all about it (and download your own pdf) at her blog post:
I cut some of these adorable girls out in black cardstock, sprayed them with spray adhesive and covered them with black Martha Stewart glitter.... the results were absolutely divine!
I happily sent my first one (adhered to a card) off to a friend to congratulate her on her recent participation in a 10k run (20th place in her age division! Go Linda!).
(It also counts as my week's participation in the 52 Weeks of Mail event... yay! This was a fun one! And it encouraged me to reach out when I wouldn't have done so otherwise!)
Okay, I am STILL loving my Martha Stewart Scoring Board!
This afternoon, I selected two coordinating pretty papers I had (a "Taj Mahal" inspired stack of paper from Premium Stacks) -- they're light cardstock:
I checked the handy cheat sheet of measurements on the inside of the compartment of the Scoring Board lid and decided that I wanted to make a base that was 4 x 4 x 4" and a lid that was 4 x 4 x 2":
As per the instructions, I cut my base paper to 12 x 12" and then scored it at the 2" and 6" marks:
(I'm only pretending to score here 'cause I'm right-handed and I can't score and take the photo at the same time)
Then I cut as shown:
Fold the flaps up and secure with adhesive to form the base box:
The top measures 8 x 8". When you score lids, you don't butt the paper to the left edge of the board. Instead, you line it up to the first mark, marked by a downward facing arrowhead. This way, the lid ends up being just a little bit bigger so it fits nicely over the base:
As per the easy-to-follow instructions, I score at the 2" and 6 1/8" marks:
Then cut the same slits:
Fold up flaps and adhere together. Then see how it fits together:
So cute!
The board includes measurements for a variety of different box sizes, but after doing a few, you can get the idea and map out your own sizes...
Back some years ago, the two scoring combatants were the Scor-Pal and Scor-It. I remember agonizing over the choice and pored through various blogs looking for guidance.
I happily settled on Diana Crick's excellent Scor-Pal and have been very happy since.
But now there's a new kid on the block. You can hardly call yourself a papercrafter and not be aware of the juggernaut that is Martha Stewart and her presence at Michael's and other crafting havens. With her cleverly designed tools, she's really created a lot of covetable items.
And now she has a product that competes directly with the Scor-Pal.
After seeing a lot of interesting videos of how to use Martha's product and with a 50% off coupon at Michael's burning a hole through my pocket, I finally sprang for the MS Scoring Board.
To help you with your own buying decision, if you are thinking of getting one tool, I thought I'd point out my own personal findings.
So here are the two competitors:
Martha's product is on the left, the clean white board. The Scor-Pal has seen a lot of years of use. You can see some ink where I've marked some measurements that I score a lot.
Here are a couple of differences. Below, the ends of the two scoring tools. Martha's tool is a lot thinner and held below:
The first time I tried out Martha's board, I cut right through the paper with the thinner tool, which was very sad. However, once I changed the way I was holding the tool (so I wasn't pressing down with the very tip) and eased up on the pressure, it worked just fine.
Martha's tool comes with measurements for common projects (cards, boxes, etc) in a compartment at the top of the board. Handy!
The Scor-Pal has its tool held near the top of the board. It is VERY easy to grab and snap back into place whenever I need it. The scoring tool in the MS board tends to rattle around in its spacious compartment and, because you have to open the space, it's not nearly as handy as the Scor-Pal's.
Another immediate difference: the MS Scoring Board has grooves every 1/8". The Scor-Pal only has grooves every 1/2" plus some additional grooves at commonly used points (like 4 1/4"). Some argue that the MS Board has too many grooves and that you can skip into a nearby groove too easily when you use it. I haven't found this to be the case. The additional grooves give you extra flexibility and allow for extra projects, like rosette-making, that would be harder to make with the Scor-Pal.
The triangle that is the extra piece that comes with the MS Board fits cleverly into a slot at the bottom of the board. This I like!
The triangle is the envelope-making part of the MS Board, which is unique to this product.
Note the handy measurements below. The video I found on YouTube describing how to make envelopes with this tool was what really sold me on trying this product and I was delighted on my first try at making an A2 envelope.
As per the instructions, I cut an 8.5" square of paper and then lined it along the edge of the triangle and scored it alternately at 3" and 3 3/4". Cut off the four small triangular pieces between the folds and voila!
A quick and special little envelope.... I can totally see designing and printing out some paper that would include a cute design on it for a really fun homemade envelope!
(in the above piece, I rounded the flap's corner for a little extra oomph.)
So, what do I think?
I have LOVED my Scor-Pal. Really, it's been a terrific part of my papercrafting arsenal! But if you don't have one already and were thinking of buying a scoring tool, I think I'd advise you to get the Martha Stewart Scoring Board. Not only is it a great deal ($20 retail, but who ever pays retail at Michael's when you can so easily get a 40 or 50% off coupon, which brings it down to the insane price of $10?), but the envelope-making tool really makes it quite a bit more versatile.
The Scor-Pal is about $30, but is only available online, so you'd have to spring for the shipping on top of it.
(Update: there is a newer version of the Scor-Pal that has grooves every 1/4" plus additional ones here and there.)
Here's how to make envelopes with the Martha Stewart Scoring Board:
The Scor-Pal's website includes a ton of intersting projects (however I find the navigation of the site a bit difficult to manage): http://www.scor-pal.com/projects.htm




 Posts
Posts