Friday, January 30, 2009

On my wish list: to get in a bind


I'm a complete papercrafting nerd -- I can spend hours just browsing through a paper store, feeling the paper, looking at glues, etc.

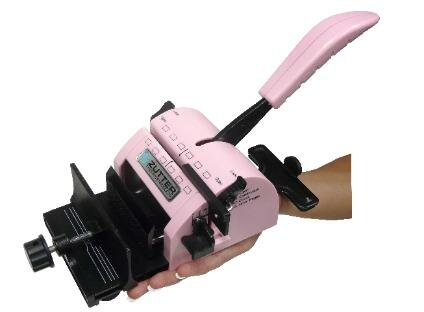
I recently went into a scrapbooking store and was demo'd the Zutter Bind-It-All.

This is the consumer version of a product that used to only be available to larger offices, print shops, etc. It can be used to bind books with a very slick, professional wire coil.

It looks very easy to use. It can cut through chipboard as well as tougher items, such as cds (imagine making a round book with a cd as its cover!).

Want to know more? Here's the Bind-It-All website: http://www.binditall.com/.

Here's another video that's so scripted and poorly acted that it's hilarious ("Really? That would be a dream. Tell me more!"), but informative: http://www.binditall.com/VideoPage2.html. The video shows the older version. The newer version is pink.

(right now, I'm only making enough money from my etsy site to keep me in my paper supplies and purchased artwork, but as I grow a bit, I hope to be able to add gadgets like this one to my toy chest.)


Ox card's visibility


My Ox card was linked to from a couple of different places.

Probably the most visible one was from etsy's Storque:
I had a couple of blog postings:
It's funny: this card has gotten me more visibility and several sales, but I almost didn't offer it, as Chinese New Year's seems like such a niche (even I've never in my life sent anyone a Chinese New Year's card, why, I reasoned, would anyone else?).

So, that's a lesson to me.

Thursday, January 29, 2009

Cosmic boy space invitation


Here's a new birthday party invitation that came together really quickly. It's amazing how fast things can go once you've found the perfect artwork (and the paper engineering part has already been worked out).

The cute space images came from istockphoto.com. The weightlessness of space really lends itself well to my spinning invitation.

I purchased the artwork one morning, worked on it during the day and was able to post it for sale later that afternoon on etsy.

These spinning party invitations, while quite simple, are also very engaging -- I have yet to hand one to someone without them instantly smiling as they turn the wheel to see all the images.
I've also gotten quite good at making them very quickly, which allows me to keep the price quite low.

Wednesday, January 28, 2009

Secret Slider birthday invitation


I've been working on this secret slider card. As I noted in a prior post, one of the design challenges of the secret slider mechanism is that the flap that covers the secret image will just cover the window if it were perfectly flat.

As the secret slider is used, though, it will not lie perfectly flat -- it will develop some pre-creases (which will actually help the mechanism work nice and smoothly), leaving a small gap at the bottom of the window.

To remedy this, I tried extending the bottom of the "plaque" that pops up to cover the gap.

It worked great!

I had concerns that the extension would "catch" on the window, but it works very, very smoothly.

This new birthday party invitation is nearly done -- I'm still poking around at the graphics that appear on the tab that you pull out as I'm not happy with that yet (and I may add in an arrow or two to give the user a clue as to what to do, though everyone that I've handed this to has been able to figure it out without additional visual clues).

Tuesday, January 27, 2009

Craft Robo: My secret weapon!


I use a Craft Robo to cut out my cards. I could not be making cards for sale without it -- I just could not justify the amount of labor it would take to cut each item by hand. Also, despite my extreme persnicketiness about cutting accuracy, I simply cannot match the precision of the robo, which is very necessary for cards like the Circus/Carnival invitations, where just an additional millimeter or so in the wrong place can make the wheel stick.

The Craft Robo makes it possible to very quickly mock up my ideas and try many different things. Plus, once I've designed a piece, I can easily mass produce them.

See the above video posted by etsy for their community to learn about this amazing tool and read the accompanying article.

Here's a link to a Craft Robo wiki that I started (the only downside to the robo is that it's not very well documented, leading me to a ton of trial and error. I wanted to put my hard-earned knowledge in one place and hope that others will also contribute)

Interested? Post a comment and give me a way to contact you! I would love to hear from you!

(I know I promised a blog posting today about the secret slider card, but I promised the guy who wrote the article to link from my blog -- he was kind enough to include links to my cards from the article as examples)

Monday, January 26, 2009

Secret slider thank you card


As mentioned, I added a background on the sleeve/envelope part of my secret slider thank you note. The burst actually comes from the circus invitation, though I've tweaked the colors. The tiger comes from that card as well.

I really like how this is coming along.

One thing I'm wanting to tweak, though. The window flap doesn't quite lie flat because it's been "trained" to flip up. Consequently, in its resting state, there's a tiny gap at the bottom of it where it doesn't quite close up, unless you hold it shut. 

I'm working on this problem. More tomorrow!

Sunday, January 25, 2009

Secret slider thank you card


Posted by Picasa

A magnificent obsession

I tend to get somewhat obsessive about my hobbies. An archeologist might be able to figure that out from my enormous yarn stash in the basement or perhaps by counting up the number of bonsai pots that are now just taking up shelf space.

I'm not even going to mention my cake-decorating phase.

So, my current obsession is with making pop-up card (or paper engineered cards, as not all my cards actually pop up, but most of them do involve some form of engineering).

I decided to spread out all the things I'd been working on for the past week and a half (this is two weekends, plus the week in between).

I'm not including the items that simply didn't work out, but you can see some of what has consumed my free time lately:
  • Two graduation cards (boy and girl -- still working on perfecting these -- I think I'll do a line of graduates, instead of just one).
  • Obama commemorative inauguration pop-up card. I started three variations, but I really need to follow through on the last idea.
  • A pig pop-up card. A coworker who is a pig lover asked me to work on this after seeing the Year of the Ox cards (apparently March is National Pig Day). I banged it together and made ten of them to deliver tomorrow -- they came out pretty nice!
  • Baby in stroller card. This pop-up card idea came about when the grade school rhyme "First comes love, then comes marriage, then comes (your friend) with a baby carriage!" I think this is pretty cute and having a baby card will be a nice addition to my store, but it needs a little work still.
  • Designed and fiinalized the heart with wings Valentine's Day card and posted it on etsy.
  • Finalized the Alice in Wonderland birthday card and posted it on etsy.
  • Put together a flyer for another coworker to contribute to her school's auction (I'll be doing birthday party invitations for the winning bidder) and printed, cut and assembled several mock-ups for examples.
  • Worked on the "Guess who thinks you're awesome?" secret slider thank you card for a potential circus invitation buyer -- I put in a printed background on the sleeve part of the piece and it really looks a ton better.
  • Worked on a "Guess who's turning five?" secret slider birthday invitation with a birthday cake that pops up. This is coming out totally cute. I'll be posting photos and commentary on this one soon. One nice aspect about this one is that it's not themed and it works equally well for both sexes and even for adults.
  • I completed a custom order for some spinning birthday party invitations for a gal who gave me a bang up review! (see prior post) I could not have paid her to write up a more glowing report, so this was extremely satisfactory.
  • I started, completed and posted a new spinning birthday party invitation for a space-themed party.
  • Tried out cpeep's floating table popup, added a roof to it and have the germ of an idea to make a popup dollhouse or something of the sort... (she kindly added the photo of my idea to her blog)
  • Tried out the bobbing duck mechanism... needs work!
So, lots of activity lately! The trick is to not get too burned out... it really can be tiring to work full-time, try to spend quality time with the kids and husband and try to bang out a new card or two to post every week. I really haven't slept a full 7-8 hours in quite some time (early morning, around 4am, is VERY productive for me!).

Being able to post and make an occasional sale on etsy has really spurred me onto a flurry of activity. Getting positive feedback in the way of sales really encourages me to do more, plus the tiny bit of money that I make off each sale allows me to purchase additional raw materials (images, cardstock, glue, etc) to use in creating even more cards.

I'm not really sure where this is all going to end (may end up in my total collapse from exhaustion at some point -- I have so many ideas that I'm dying to try out but just don't have time to do), but for now, I'm just having so much fun with all of this that I can barely stand it.

Saturday, January 24, 2009

Feedback and joy

I got a set of spinning birthday invitations out in the mail earlier this week and today I found this in my communications, from my customer:

"I received the invitations today and they are the CUTEST invitations I have ever seen. You did an awesome job and was exactly what I was looking for. I will definitely be referring you to my friends and families! My son absolutely adored the invitation and was so excited!

Thank you so much for these unique invitations and I will be ordering from you again in the near future. And thank you for the [bonus gift]!!"

Positive feedback is such a powerful thing for me (and such a plus to my etsy site) -- this note really made my day!

("Bonus gifts" are something I'm adding in to larger orders. I always loved getting the mystery prize in the box of cereal and it makes me happy to add a little something extra into these packages)

----------------------------------

Check out this chance to win some papercrafting "candy" from a fellow blogger. It's only available til January 28, so get there soon! http://katysbloggeroo.blogspot.com/

Friday, January 23, 2009

Inspiration from across the pond

I love cards that have unexpected action and find my inspiration in a variety of different places. I recently discovered a UK firm specializing in unusual promotional materials. This stuff blows my mind. Here's just one video:


Very clever, well-executed ideas. I am trying to figure out how these mechanisms work -- it inspires me to reach a little farther in my paper engineering efforts!

Check out their website for absolutely a treasure trove of wonderful items:


Wednesday, January 21, 2009

Secret window slider

Personally, I'm not a fan of Stampin' Up! (I'm just not a stamper, really preferring the flexibility of designing digitally on the computer), but I found a series of videos by a Stampin' Up! representative who has some clever ideas for interactive cards.

Here's one of her tutorials for a Secret Window Slider:


I am currently working on a set of Circus invitations (which are proving to be some of my most popular invitations). The mom I'm working with requested coordinating thank you notes. I sent her a photo of the simple folded card thank yous that I had used for the twins' party last summer, but these aren't "fancy" enough.

I've adapted Dawn's technique to a thank you note. See below for photos showing the mechanics of this card. (note: I'm not done with adding graphics to it yet. While I like the tiger and the sign that it is leaping over, the plain blue wrapper isn't doing anything for me. I intend to print circus graphics on white cardstock to replace the wrapper.

So the idea is that the recipient receives an item that asks: "Guess who thinks you're awesome?"

When they pull the tab (which will be decorated and marked with a handy arrow), they will reveal the child's photo, at the same time popping up the tiger unexpectedly and also revealing white space on the pull out tab upon which someone can add a personalized message (alternatively, the tab can say something like "Joseph does, that's who!" and I can leave a blank area on the back where a message can be added).

I'm pleased with how smoothly this mechanism works.


Monday, January 19, 2009

Further down the rabbit hole


The Alice in Wonderland birthday card is getting much closer to being sellable. A nice simple wallpaper background spruced up the front and some Photoshop rendered clouds and a simple green gradient underneath the text really took the stark whiteness out of the inside of the card.

I showed a preview copy of the card to a few friends and I THINK that this one might actually sell... but on the other hand, that's what I thought about the pop-up birthday cake card also, and that one hasn't even had a nibble!

------------------------

UPDATE: 1/24, this card was finalized and posted for sale on etsy: http://www.etsy.com/view_listing.php?listing_id=20160749

Sunday, January 18, 2009

Valentine's Day card

Inspired by the wild success that my fellow etsy crafter, xlessthan3, with his Valentine's Day-themed products, I decided to design one myself. After all, I have a ton of really beautiful (and expensive) red cardstock to burn through!

I found a lovely heart on istockphoto, from which I made a simple silhouette.

I had one major catastrophe when the power went of briefly this morning, which resulted in my losing all the work I'd done on the card, but it was simple enough to recreate.

I think it came out great! They're now posted and ready for sale here: http://www.etsy.com/view_listing.php?listing_id=19906957


Saturday, January 17, 2009

My date with the axe murderer


I tend to be somewhat impetuous. There's a reason why Tad and I make a good team. He's the safe parent. I'm the one who lets her two-year old boys play with unsafe pointy metal things ("You let them play with KNITTING NEEDLES????"). The boys and I would likely have not made it this far without Tad's safe and patient intervention.

I've been watching etsy closely for a project where I'm asking super-cool etsy sellers to contribute to our school auction, which is coming up in March. 

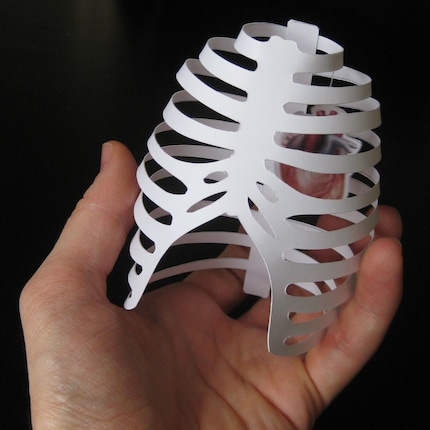
One local seller's work kept on popping up on the listings. He was selling a cut-paper rib cage with a paper heart suspended in it. A very unique Valentine's greeting.

Anyway, I contacted him, asking him for a contribution. At the same time, I couldn't resist asking him if he had a digital cutter. I could not imagine doing all that intricate cutting by hand. To my surprise, that was exactly what he did do.

So this is where I finally get back to the "Molly is a little bit impulsive" part of the thread. 

After a couple of etsy conversations, I invited him over so I could demonstrate my craft robo to him.

I did ask him to promise that he wasn't an axe murderer. He did, however it occurred to me that this was exactly what an axe murderer would tell me.

I was a bit embarrassed to have to relate to the husband what I'd done, but he must be getting used to me by now as he just shook his head resignedly and told me that he'd be sure to be at home when the potential serial killer showed up.

Happily, my fellow paper crafter turned out to be just as he appeared to be and we had a great afternoon comparing notes about projects and watching the craft robo whiz through what would normally take him 30 minutes to accomplish.

Anyway, I think he's convinced that the robo is what he needs to actually be able to produce enough of his valentine to keep up with demand and make a little more than minimum wage.

I'd be really interested to see what else he comes up with in the future!

Friday, January 16, 2009

Alice in Wonderland Cards

This first photo is terribly blurry, but I was in a bit of a rush to get these taken and posted. This is the Alice in Wonderland card that I created using the digital artwork I purchased from an etsy seller.

These are the very simplest kind of pop-ups, using a technique called the box (or parallel fold or step). See a tutorial about this technique at cpeep's blog.

I'm pleased with how these came out so far, however there's too much stark white on it now. I'm going to work on putting some blue sky on the inside behind the figures and have them standing on a field of green.

I'm contemplating whether or not it would be worth it to purchase a lovely Victorian-look wallpaper background to put behind the rabbit on the front. It would cost me an additional $10, on top of the cost of the original artwork, and, of course, I would have to sell quite a few to offset the additional cost.

The additional work won't take too long though and I may actually have a new birthday card to sell before too long!

{update: this is the listing for the final Alice in Wonderland Pop-up -- it's already been a good seller for me!}


Posted by Picasa

Thursday, January 15, 2009

More vintage artwork

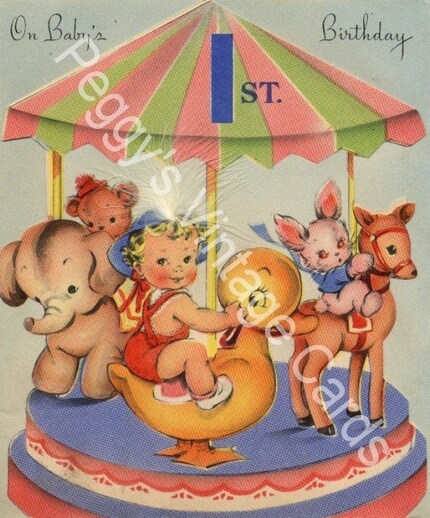
I bought a cd of vintage birthday party artwork -- seems like a perfect way to kick off my potential line of vintage-inspired cards.

The artwork was scanned by PeggyLovesVintage and it arrived quite promptly (I ordered it on the weekend and received it on Wednesday).

The scans were better than expected. Of course, there is noticeable wear on some of the cards, fading and some minor stains, but that is to be expected. The scans are of very high resolution (600 dpi), which suits me very well, and there's a wide variety of images to choose from.

The 340 images on the cd include the insides of the cards (so you're not getting 340 cards), some of which have some cute phrasing and artwork, so I actually appreciated this.

A few of the cards are a bit interactive. One of them turned into a mask, some had cut-outs. One turned into a simple folded toy. There was a simple wheel mechanism on some that allowed the recipient to change the images in a window. Very fun stuff that you don't often see any more!

I'll post some photos of a kangaroo card that I've reproduced as well as the Alice in Wonderland pop-up card that is still in process, as soon as I can get some photos taken.

For less than $10, I'd say I got a really good deal!

Wednesday, January 14, 2009

Paper Genius

I would not blame anyone for being skeptical about anyone who introduces himself as a "paper genius" but Carlos Molina is pretty darned good.

Check out his website, with some fun tutorials (he includes downloadable templates): http://www.carlosnmolina.com/

I missed the boat on his clever paper balls for Christmas, but these would definitely be a fun project for next year.

In addition to the video tutorials, he also includes the downloadable templates. I love how generous people are in sharing their talents!

Tuesday, January 13, 2009

Ox Cards... Success can be painful


This evening I got another order for the Chinese New Year's Year of the Ox Cards, for a pack of ten.

Great news, right?

It was exciting to hear that someone wanted a set, but then I realized how much work I was in for tonight. A round of printing, then laboriously cutting (while the Craft Robo is wonderful, it sometimes has problems with the intricate details of the ox's nostrils and the delicate curve of its tear duct, so I end up having to meticulously cut away at the hanging chads with an exacto knife) and finally assembling each piece, which could easily take up my entire evening.

I can't believe that at one time, I actually had contemplated selling them for $3 each (or $25 for a pack of ten). That would, for the volume discount, be $2.50 for EACH CARD. Simple silly mass-produced cards at Walgreen's cost more than that!

My initial price that I listed was $3.50 each, or $30 for a pack of ten.

After selling my third pack of ten (tonight), I have seriously reconsidered my pricing and upped the price considerably. I'm now giving it a whirl at $8 a card (which is actually pretty standard for something elaborate on etsy). The volume discount is $60 for a pack of ten.

We'll see how that flies.

Meanwhile, there are tiny little white spirals of ox nostrils scattered all over my dining room table...

Birthday Cake Card


The success of the Chinese New Year's Year of the Ox card lead me to believe that I need to diversify from children's birthday party invitations. The customization really eats a lot into my time. Being able to create something that I would just keep in my inventory and be able to ship out immediately upon a sale was really appealing.

Capitalizing on the pop-up mechanism that I learned to make the volcano card, I created this birthday cake pop-up card.

As you open the card, the cake shoots upward.

Figuring out this card required my trying to recall high-school geometry. Trying to apply the pythagorean theorem to a triangle I was measuring in fractions of inches blew my brain until I switched over to the metric system!

I've already posted it for sale on etsy. Take a look there for a peek at my final product..

Sunday, January 11, 2009

Digital art sources


I love artwork. I rely very heavily on the creative illustrations of others (the one exception is the artwork on my Fish Invitation, whose sea creatures were done by moi, purely because I couldn't find fish illustrations for cheap when I needed them).

My favorite source has long been istockphoto.com, which serves up a ton of photos, illustrations and more. I tend to use the illustrations as they often better suit the style of my cards. It really is a wonderful source, and, while you do have to pay for each item, photos are as low as $1 (for a low, web-resolution image). Illustrations are typically $10, but since I started designing cards professionally (it seems odd to say that, but I guess I lost my amateur status with my first etsy sale. Huzzah! But, sadly, will never get to compete on the Olympic level if card-making were ever deemed an actual sport) then forking over that small initial investment has seemed worth it for the quality of the artwork that I've been buying.

I was recently impressed with some cards that were sold locally that featured vintage artwork (illustrations of happy housewives, cute old-fashioned valentines day cards, etc) and wondered where to find something similar.

It was right under my nose: etsy!

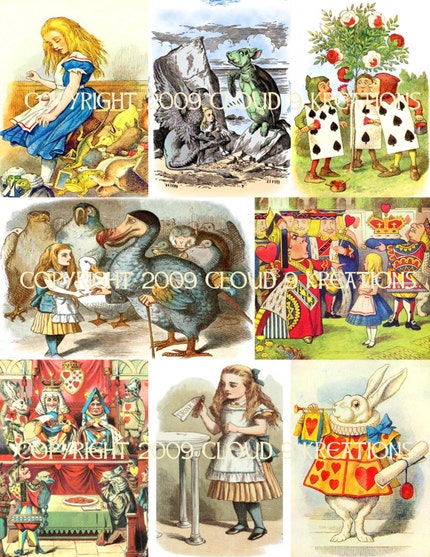
I found some truly lovely Alice in Wonderland artwork from rebelsher, a fellow etsy seller. A number of etsy folks seem to do quite well by collecting and scanning artwork that is now in the public domain. Costs and quality between different vendors appear to vary widely, but I'm quite pleased with my Alice in Wonderland art, which was emailed to me quite promptly.

The cost for this: $2.50! What a wonderful bargain! And the same seller has some other similar artwork to check out as well...

I'm working on a pop-up card with the Red Queen pointing an accusatory finger at Alice. Both Alice and the queen will pop up away from the background of the card.

This vintage-look card will be a bit of a departure from the rest of my work, but it is fun so far!

I will post an image of the work in progress as soon as I can get my craft robo to cooperate and finish cutting the two figures..... ergh!

This will be a cute card and, with the never-ending fascination with Alice in Wonderland, I suspect it might be popular, but I have to figure out what it's for (birthday? just a notecard?) and a cute phrase to tie it all together.... clearly the queen is screaming her trademark "Off with her head!" but how to work that into a birthday greeting.... copywriting isn't my strongest suit.

I can see a series of Alice in Wonderland note cards that I can sell as a set... hmmm.....
Saturday, January 10, 2009

Need a good 12-step program...


My name is Molly. And I am an envelope hoarder.

{hello, molly..... hi...}

Today, I'm having a "playdate" with the pop-up making mom that I met recently (the Peacock Lane excursion).

I decided to give my craft cabinet a once over, as it's pretty embarrassing. It looked likethe "before" shot from one of those extreme makeover shows.

In the course of removing things (odd random things: a Bill Clinton cat toy, miniature anvil, 3D glasses, a web-programming book, etc) I came across packs of envelopes. And more packs of envelopes. And a lot of loose envelopes.

Apparently my modus operendus when designing a card is to glance briefly inside my cabinet, become cowed by the mess and then run out and buy more. I also apparently never walk by a sale on envelopes without picking up a bargain.

I needed envelopes for my recent princess invitations and had to dash out and buy some yesterday. I was disappointed to find no colored envelopes in the size I needed and settled for white, little realizing that I already had the perfect pink envelopes.

I've spent the morning sorting everything into piles and stashing all my envelopes into a box. Okay, let's be honest: "boxes."

This year, instead of the typical resolutions (lose weight, get buff, become a better person, promote world peace) I am resolving to gain control of my envelope habit.

Wish me luck!

Thursday, January 8, 2009

Sliceforms


My friend, Bill, and his wife do freelance graphic design. We'd talked, briefly, about doing some clever pop-up marketing together in the past.

This evening, he sent me this url, for a company that creates some very cute snowglobe promotional products: http://shop.3dpapergraphics.com/

Check out their very clever use of clear plastic with print. Very nice!

Their use of sliceforms, which is what these types of popups are called, is not particularly new, however they do a very nice job of an old idea.

If you're interested in learning about how to create your own sliceforms, check out cpeep's tutorial to create a sliceform christmas tree.

After getting Bill's email this evening, I took it upon myself as a personal challenge to replicate the snowglobe in sliceform fashion. The model on the left is very rough, but I just wanted to show that I could do it. 

I was impressed with how it folds completely flat, but then expands easily to form a very solid-seeming object.

(I also add, that, in addition to designing the snowglobe sliceform, I also got dinner on the table, gave two squirmy boys baths, read them a bedtime story, checked my email, made a few ox cards and did a comp for a (sold!) princess card at the same time -- life can be challenging for the working mom with hobbies!)

Naturally, the snowglobe design that 3D Graphics created and are marketing is patented and should not be copied for commercial use, which I wouldn't do. I just wanted to prove that I could figure it out.

Sliceforms, on the other hand, are a widely used technique. I just have to figure out a clever way to use them (that isn't snowglobes). 

For another reference that discusses sliceforms, see Paper in Three Dimensions, which shows you how to create an Eiffel Tower using this technique.

Many solid shapes can easily be converted to a sliceform... it's fun! Give it a try!

Wednesday, January 7, 2009

flexagon

My brother-in-law, Alec, got me a GREAT book for Christmas called Magic Books and Paper Toys.
Magic Books & Paper Toys: Flip Books, E-Z Pop-Ups & Other Paper Playthings to Amaze & Delight

It is AWESOME! There are some very creative and innovative little paper items, along with some classic ideas, like cootie catchers. I very much recommend it if you are looking for some interesting ideas to try.

One toy that they feature is what they call a flexagon. This is a paper toy that you unfold. And unfold. And unfold. You can continue to unfold it forever, which seems impossible and is terribly hard to describe, so please look over these photos of a flexagon that I created for my brother-in-law as a thank you for the nice gift.


For another kind of flexagon from the same book, check out this recent post from a fellow blogger (and new-found paper buddy): http://extremecards.blogspot.com/2009/01/flexigon.html